How to reverse engineering an Android App and Its API— Example with an app from the US government
In the past, I’ve developed several native and cross-platform Android applications (using Ionic) and thus, I’m quite familiar with how they work.

In the past, I’ve developed several native and cross-platform Android applications (using Ionic) and thus, I’m quite familiar with how they work. Today, on an application, whose name I will intentionally omit, I must perform a repetitive task several times a week and ensure I’m among the first to do so. Another problem is that there’s a specific known time for this, but slots may open up throughout the day.
Throughout this article, I will use an application as an example; I’ve chosen the app provided by the U.S. government that offers information on national parks. I highly recommend it if you’re visiting the U.S.: https://play.google.com/store/apps/details?id=gov.nps.mobileapp&hl=fr&gl=US
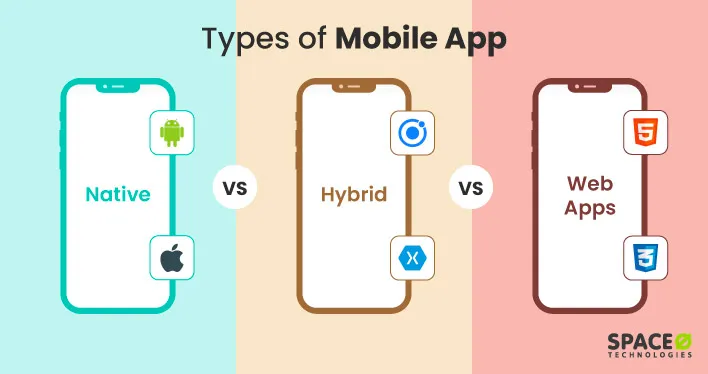
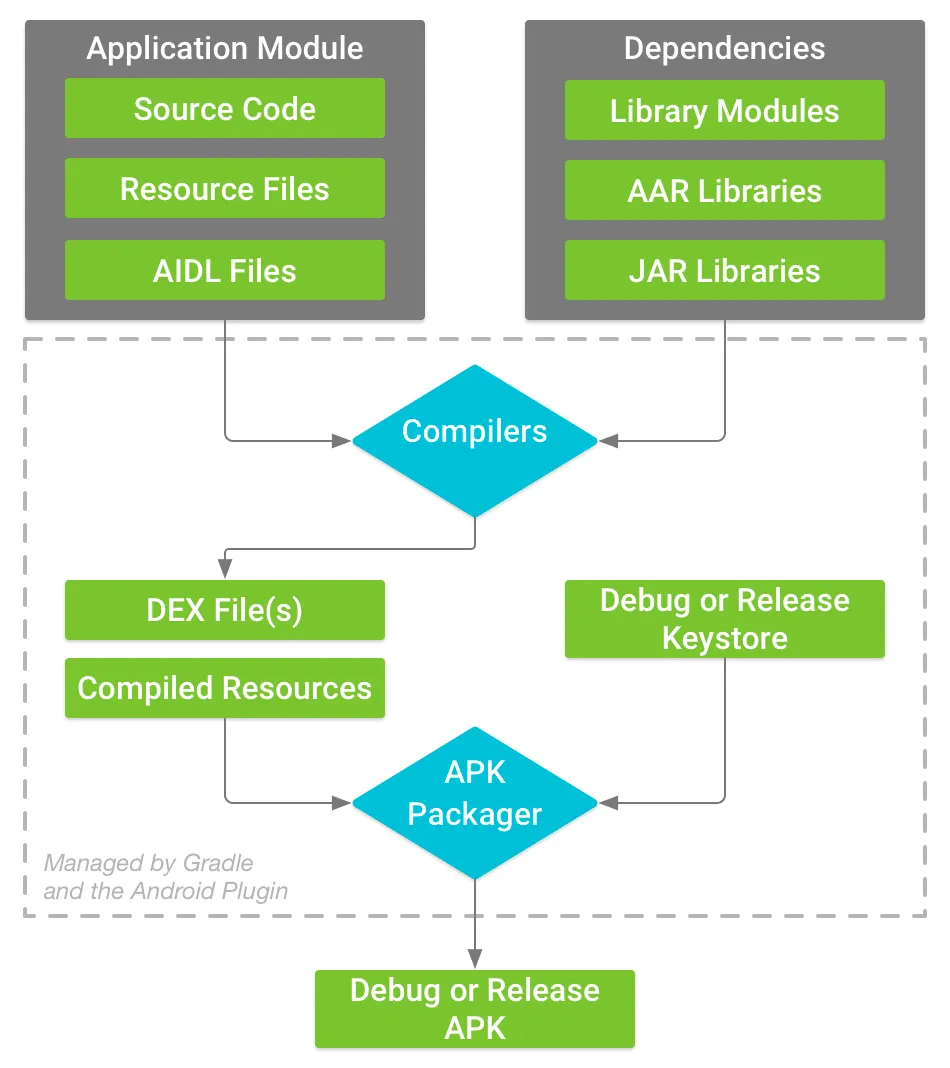
To start, let’s revisit the operation and architecture of an Android application. There are 3 types of applications:
- Native apps: A native Android app is developed in Java or Kotlin via Android Studio, optimized for Android, offering high performance and full access to the phone’s features.
- Hybrid apps: A hybrid application is developed with web technologies to function on multiple platforms, offering wide portability at the potential expense of performance and system integration.
- Web apps: A web application operates in an internet browser and does not require installation on the user’s device, offering universal accessibility but with limitations in terms of performance and access to system features.
To determine the type of an application, you need to retrieve its APK, the installation package. Generally, if the APK file is a few MBs or tens of MBs in size, it’s likely a native app. To be certain, there’s no choice but to open this installation package and do some digging.
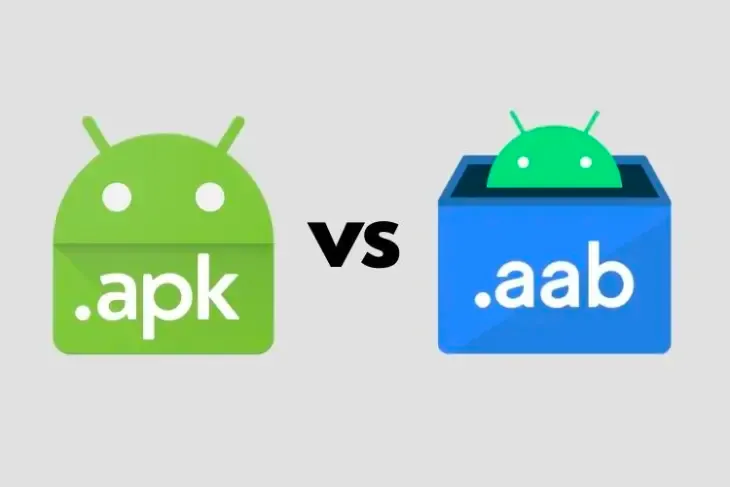
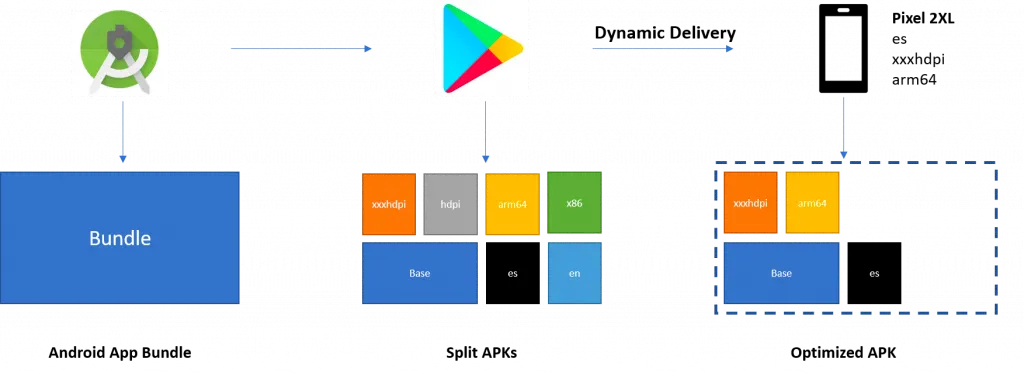
I mention APKs, but it’s important to know that Google has implemented a new packaging system called AAB (Android App Bundle). It replaces the traditional APK (Android Package Kit) as the publication format on the Google Play Store. The AAB allows for the creation of a more optimized and lighter version of the application by downloading only the resources and code specific to the user’s device configurations (CPU architecture, screen density, languages, etc.), instead of downloading a single package containing all possible resources.
Using AAB helps developers reduce the download size of their application, thereby improving user experience by speeding up the download process and reducing the required storage space on the device. Additionally, it simplifies the application version management process for developers, as Google Play automatically generates the optimized APKs for different devices from the application bundle.
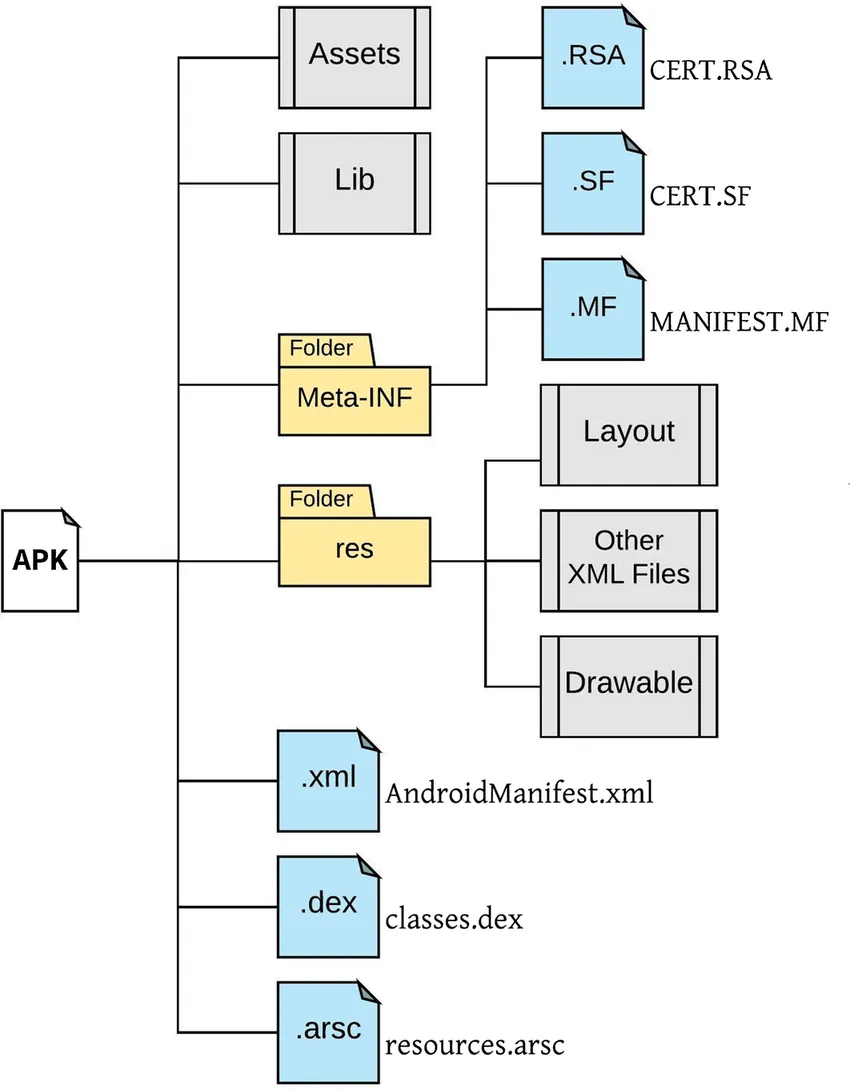
Here is how an APK file is constructed:
Thus, we find a tree structure of this type:
To retrieve the APK file, there are two methods. The easiest way is to find the file on the internet; many websites act as mirrors for the Play Store and offer an easy way to download APK files. Or, build it from the application installed on your phone using another application.
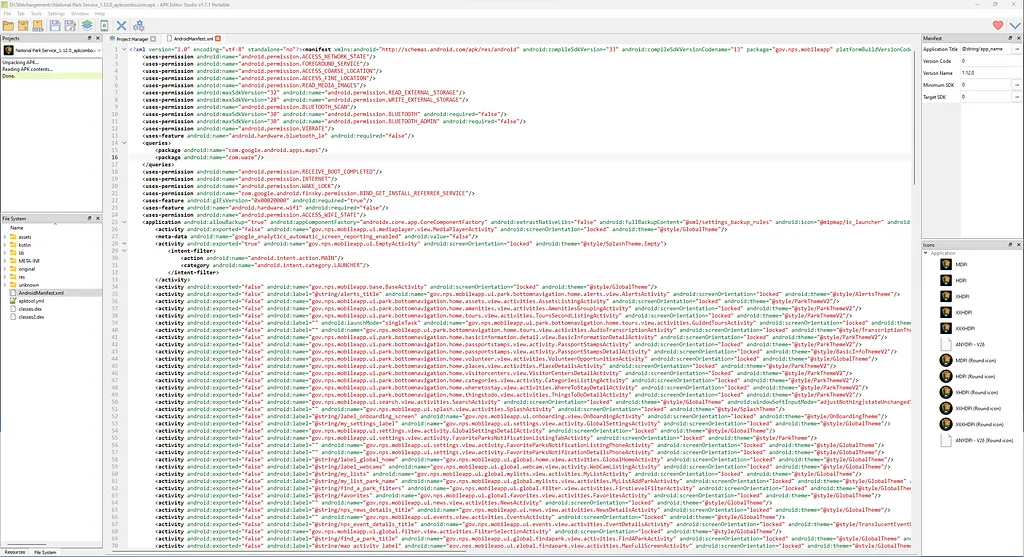
To read our APK file, there are several solutions. The most widespread and reliable is to use JADX, but in my case, I will use APK Editor Studio, which will make the task easier for me afterward. If you prefer to use JADX, here is a very good article on the subject: https://korben.info/decompiler-application-android-apk-recompiler.html
After opening our APK, we can start to sift through the code files to understand how our application works and what it uses. In my case, this proves to be challenging, and I’m leaning towards another method. I could deduce from the code that the application uses standard protocols to communicate with an API:

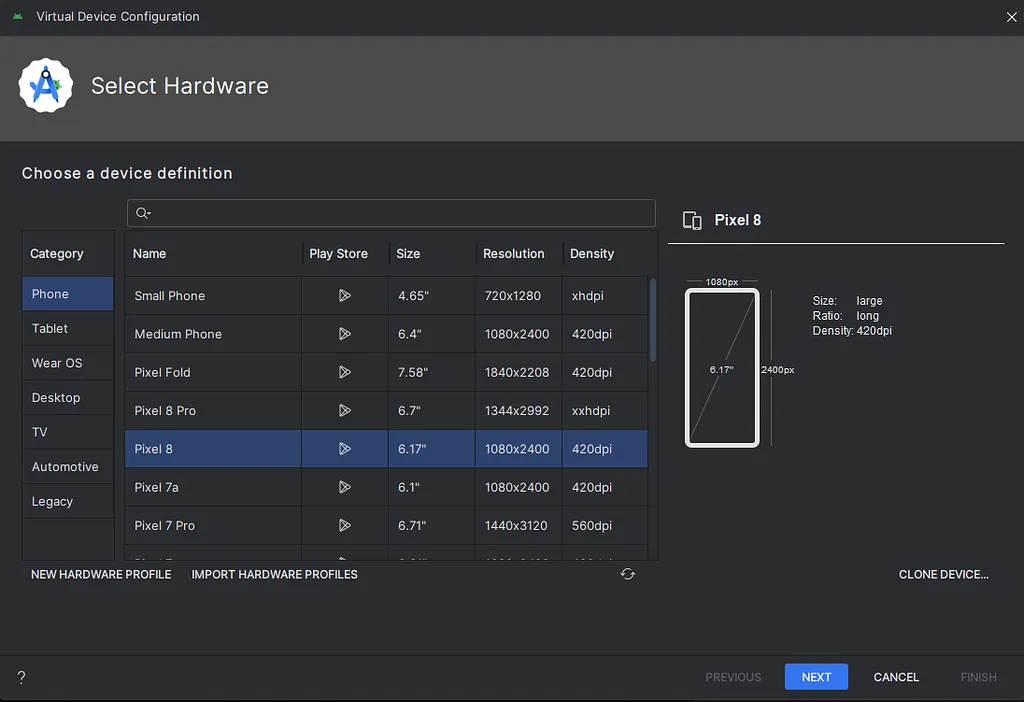
I decided to install a proxy, in my case Charles (though you’re likely familiar with Wireshark), to observe all these requests. Before doing this, I set up an emulator in Android Studio to have a controlled environment.
Selecting a phone, the choice matters little here; in my case, I know I need Google services, so it’s important to ensure there’s a small icon in the Play Store column.
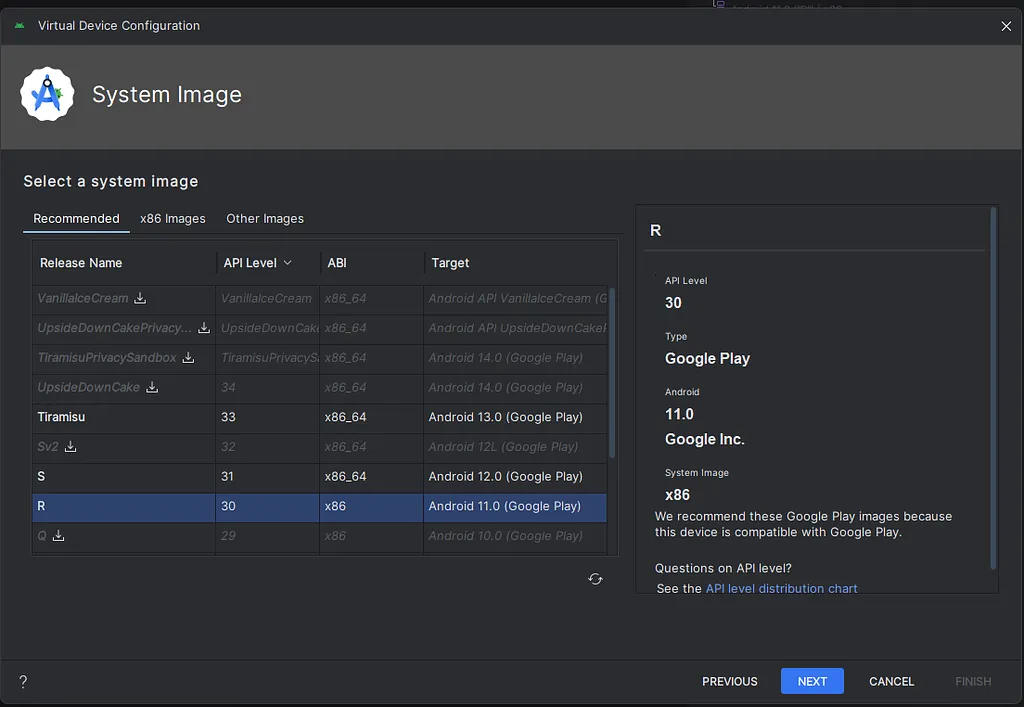
I choose a fairly recent SDK without necessarily picking the latest one, to have resources available on the web in case of bugs.
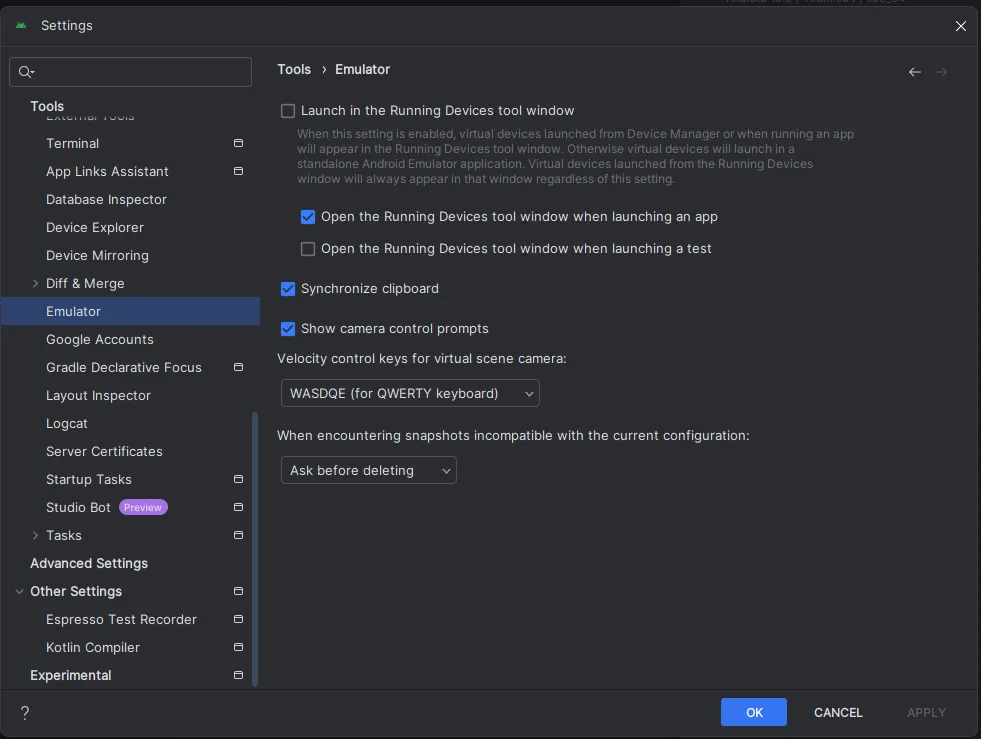
A subtle detail in Android Studio: to access the settings, including those for the proxy, you need to go into the settings and uncheck the “Launch in the Running Devices tool window” option.
We start Charles to launch our proxy. We enter our local IP and the default port for Charles, which is 8888. We copy this information into the settings section of the emulator.

We can start to intercept our requests by launching our application :
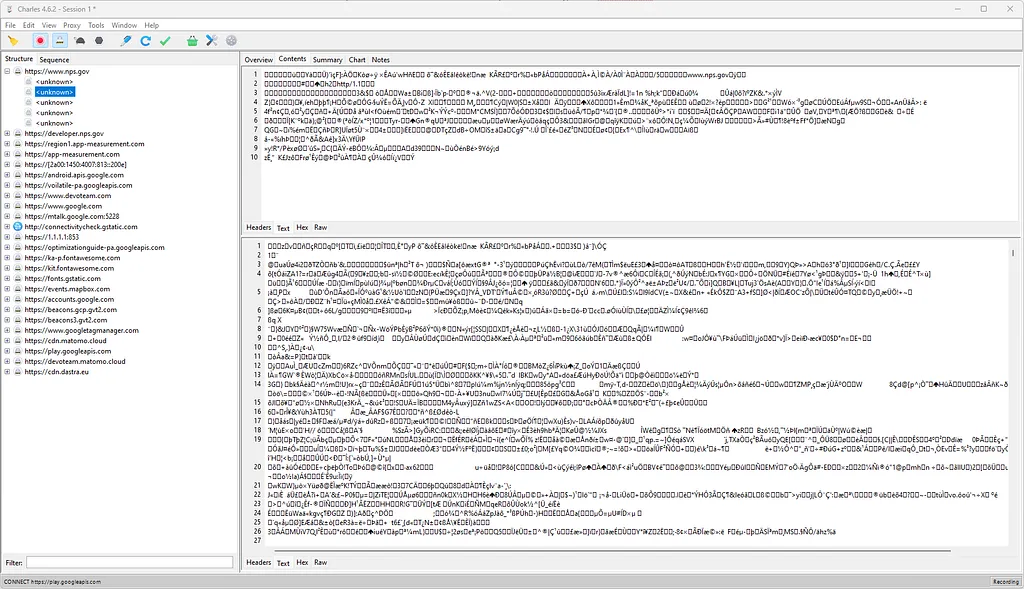
It’s normal if we don’t understand much at first, as almost the entire web now uses the HTTPS protocol, which secures data in transit. To deal with this, we need to activate SSL proxying via the button shaped like a padlock.
![]()
When I restart the request interception, I notice that I receive nothing except an error: “SSL handshake with client failed: An unknown issue occurred processing the certificate (certificate_unknown).”
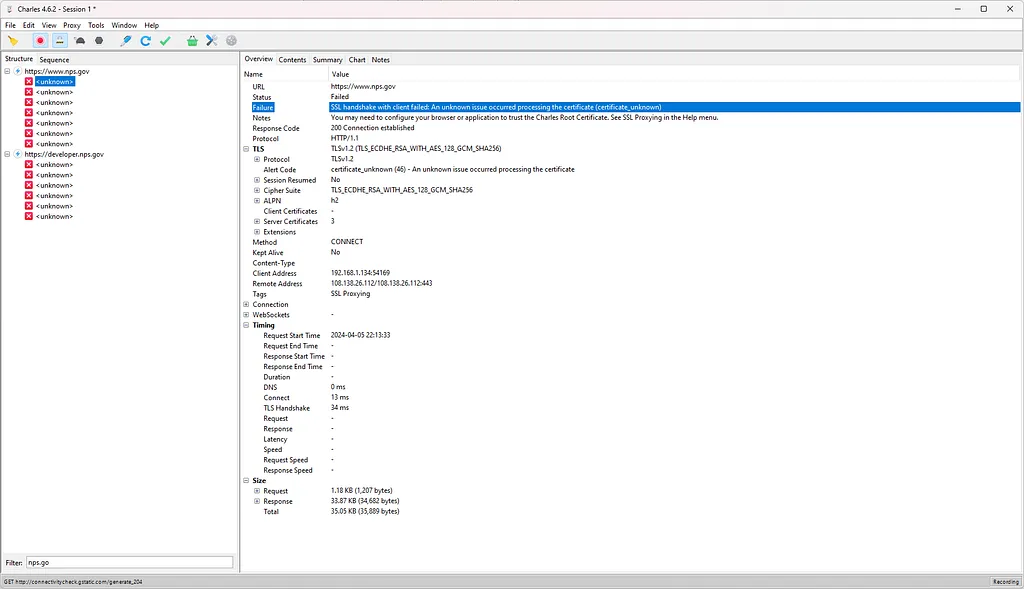
And that’s quite normal; I am clearly in this situation, where SSL indeed serves to protect the request.

Ok, the problem comes from the certificate, but I have control over my emulator. What if I gave it my “fake” certificate from the proxy? Let’s try!
Ok, let’s add the certificate to our system. On our emulator, go to the URL http://charlesproxy.com/getssl with the proxy still activated; otherwise, it won’t work. We go to Settings->Security->Encryption & credentials->Install a certificate->CA certificate.
Still the same result! But why?
Previously, up until Android 6 (API 23), one could add a certificate to the device, and the application would trust it by default. Now, that’s no longer the case; you have to add a piece of code to your application to tell it to accept certificates added by the user. You may not be able to see decrypted SSL traffic from the app unless the app’s developers have enabled support for user certificates. Here is the post if you want to dig deeper: https://android-developers.googleblog.com/2016/07/changes-to-trusted-certificate.html
Indeed, it’s relatively straightforward in our case since we have access to the code. We just need to modify the specific file in question and recompile our application. There’s a little nuance, though: we must sign our application because it’s mandatory on Android. Obviously, we won’t be able to re-sign it with the original key, but that’s not an issue.
Let’s modify our app. I use APK Editor Studio, which allows me to easily modify resources and re-sign the app with one click.
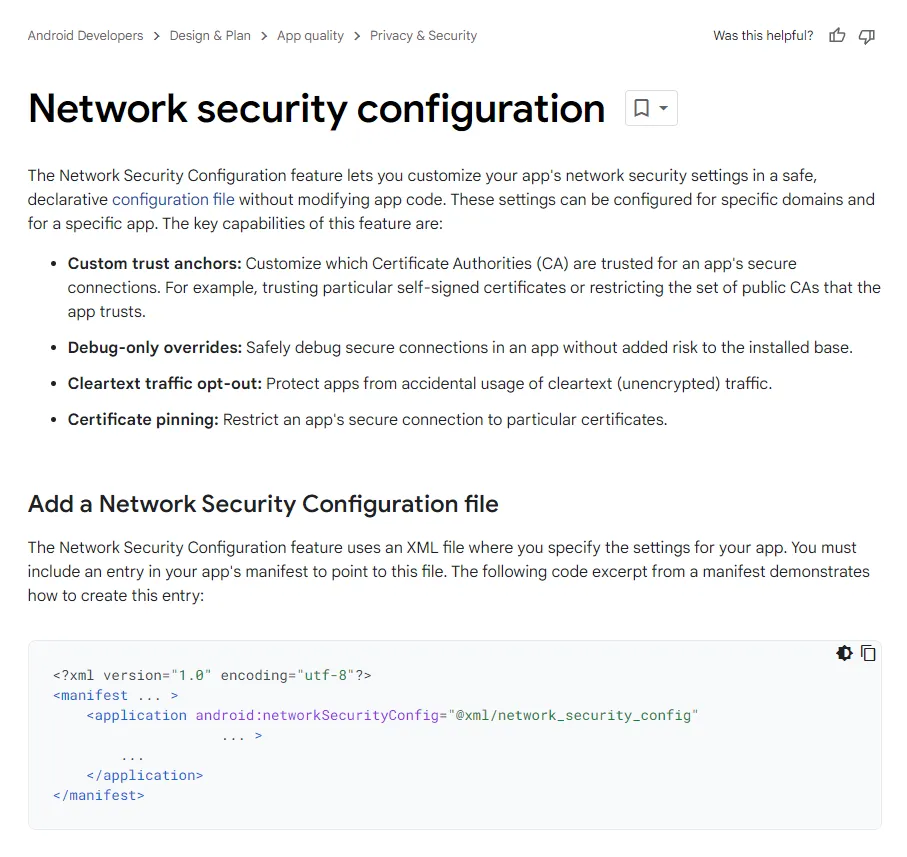
We just need to modify or create the file res/xml/network_security_config.xml
To edit the “AndroidManifest.xml” file and specify that the app should use the modified “network_security_config.xml” file, you need to locate the
This tells the Android operating system to refer to your custom network security configuration file (network_security_config.xml) for instructions on network security policies, including the acceptance of custom certificates for SSL. This step is crucial for allowing your application to trust the proxy’s SSL certificate, enabling you to intercept HTTPS traffic without errors.
Recompile the APK using APK Editor Studio. This process combines the edited files and resources into a new APK file and signs it. Signing an APK is mandatory for its installation on our emulator. Before installing the new version, ensure to delete the old one, as the keys are different, and you won’t be able to install the new one over the old one.
Let’s retest… And it works!
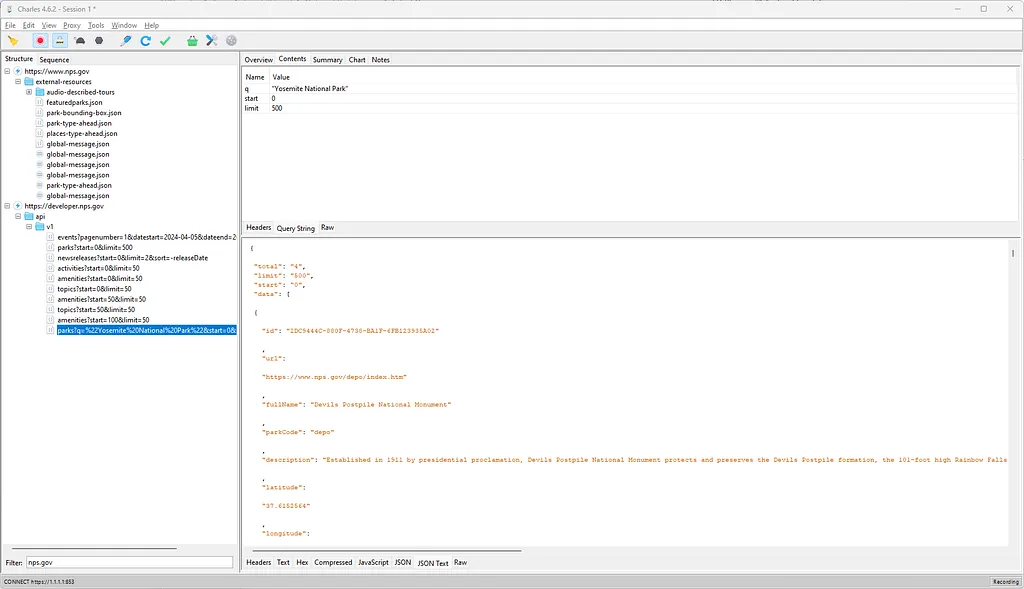
Now, you can navigate through the application and see the API routes being called in real-time, which will allow you to reuse them in scripts or small programs. This opens up possibilities for automation, testing, or even understanding how the application communicates with its backend services.
In my next article, we’ll explore how to circumvent the CORS issue using AWS.
Read next
Welcome to my blog
First post: why this blog, what you'll find here, and what I'm cooking up behind the scenes (Udemy courses on Terraform & AI).
Read more →
Watch AWS Transform Custom migrate a PHP app to Python + Angular
Strava put their Year in Sport behind a paywall this year.
Read more →
Brilliant, Broken, and Frustrating: My Deep Dive into Amazon’s Kiro AI IDE, the Flawed Junior…
We’ve all been there.
Read more →